I feed my starter twice a day at 8am and 8pm and I start this recipe at 11am - 12pm. Completed by 12pm - 1pm ready for bulk fermentation on the counter top.
*Your starter should be double in size by 12pm if you fed at 8 am. This means the starter is strong enough to produce a loaf. I typically bake my loaves at 6:30pm. Elevation, kitchen temperature, outdoor temperature, and the season changes can affect how fast or slow your starter and loaf will rise. For example, in fall/winter when the temperature is cooler my starter rises slower in the morning after 8am feeding. Monitoring and learning about the behavior of your starter is key.
*Please note your starter strength is key. It should double in size with 4-6 hours after being fed to produce a successful loaf.
- 300g spelt flour (whole or white)
- 200g bread flour (for added gluten strength)
- 150g active sourdough starter (100% hydration, fed and bubbly)
- 250g water (60% hydration of the total flour weight)
- 30g honey (about 1.5 tablespoons)
- 8g salt (about 1 1/2 teaspoons)
-
Mix the dough:
- In a large mixing bowl, combine the spelt flour, bread flour, and salt.
- In a separate bowl, mix the sourdough starter, water, and honey until the honey dissolves.
- Pour the wet mixture into the dry ingredients and stir until a stiff dough forms. It will feel firm because of the low hydration.
- Let the dough rest for about 30 minutes to allow the flour to hydrate.
- Knead the dough by hand for about 5-7 minutes. Spelt doesn’t need much kneading as bread flour, so be gentle to avoid overworking the gluten, which can make the dough collapse. Alternatively, you can use the stretch-and-fold method every 30 minutes during bulk fermentation instead of intense kneading.
- Place the dough in a glass bowl, cover it with a damp cloth or plastic wrap, and let it rise at room temperature for 4-6 hours, depending on your room temperature. It should increase in size by about 50-70%. Spelt ferments faster than regular wheat, so keep an eye on it.
- Once the dough has risen, turn it out onto a lightly floured surface. Gently shape the dough into a loaf by flattening it slightly, folding the edges in, and rolling it into a tight log shape
- Place the shaped dough into a lightly greased glass bread pan.
- Place a plastic shower cap around the top of the loaf pan to prevent the dough from drying out. Let the dough rise for another 2-3 hours at room temperature. It should rise to about 1.5 times its original size, just below or at the rim of the bread pan.
Preheat the oven:
- Preheat your oven to 230°C (450°F) about 30 minutes before baking. If desired, place a baking tray with hot water at the bottom of the oven to create steam, which helps with oven spring and crust development.
- Bake the loaf at 230°C (450°F) for the first 10-15 minutes to give it a good initial rise.
- After the first 10-15 minutes, reduce the oven temperature to 200°C (390°F) and bake for another 25-30 minutes until the loaf has a golden-brown crust and sounds hollow when tapped on the bottom.
Cooling:
- Once the loaf is fully baked, remove it from the pan and allow it to cool on a wire rack for at least 1 hour before slicing. This helps the crumb set properly.
Autolyse:
Kneading:
Bulk fermentation:
Shaping:
Final proof:
Baking:
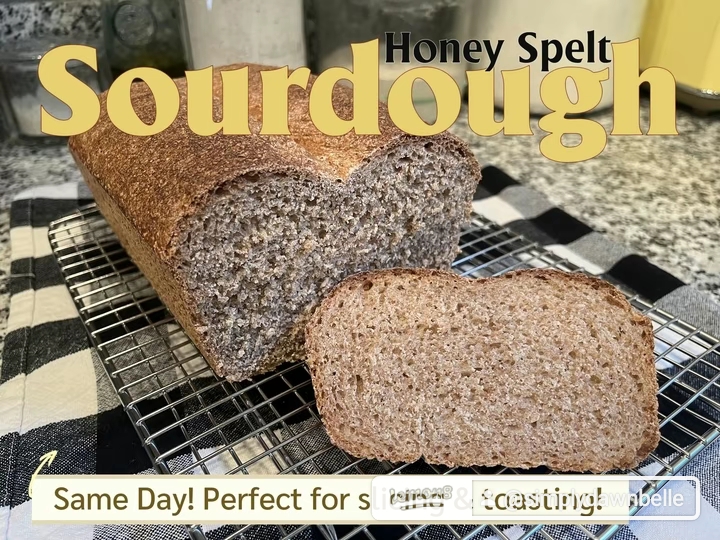
- Honey adds moisture, a slight sweetness, and helps with browning, making the crust a bit richer in color.
- This recipe is at a low hydration at 60%. This will result in a firmer dough and a denser, more structured crumb. If you want a lighter loaf, you could increase the hydration slightly, but 60% keeps the dough easy to handle in the bread pan.
- This recipe should give you a slightly sweet, nutty-flavored sourdough loaf with a firm structure, perfect for slicing.
- After my loaf has cooled on a wire rack for 2-3 hours I store it in my bread box before going to bed. I don’t slice my loaf until the next morning. Enjoy!